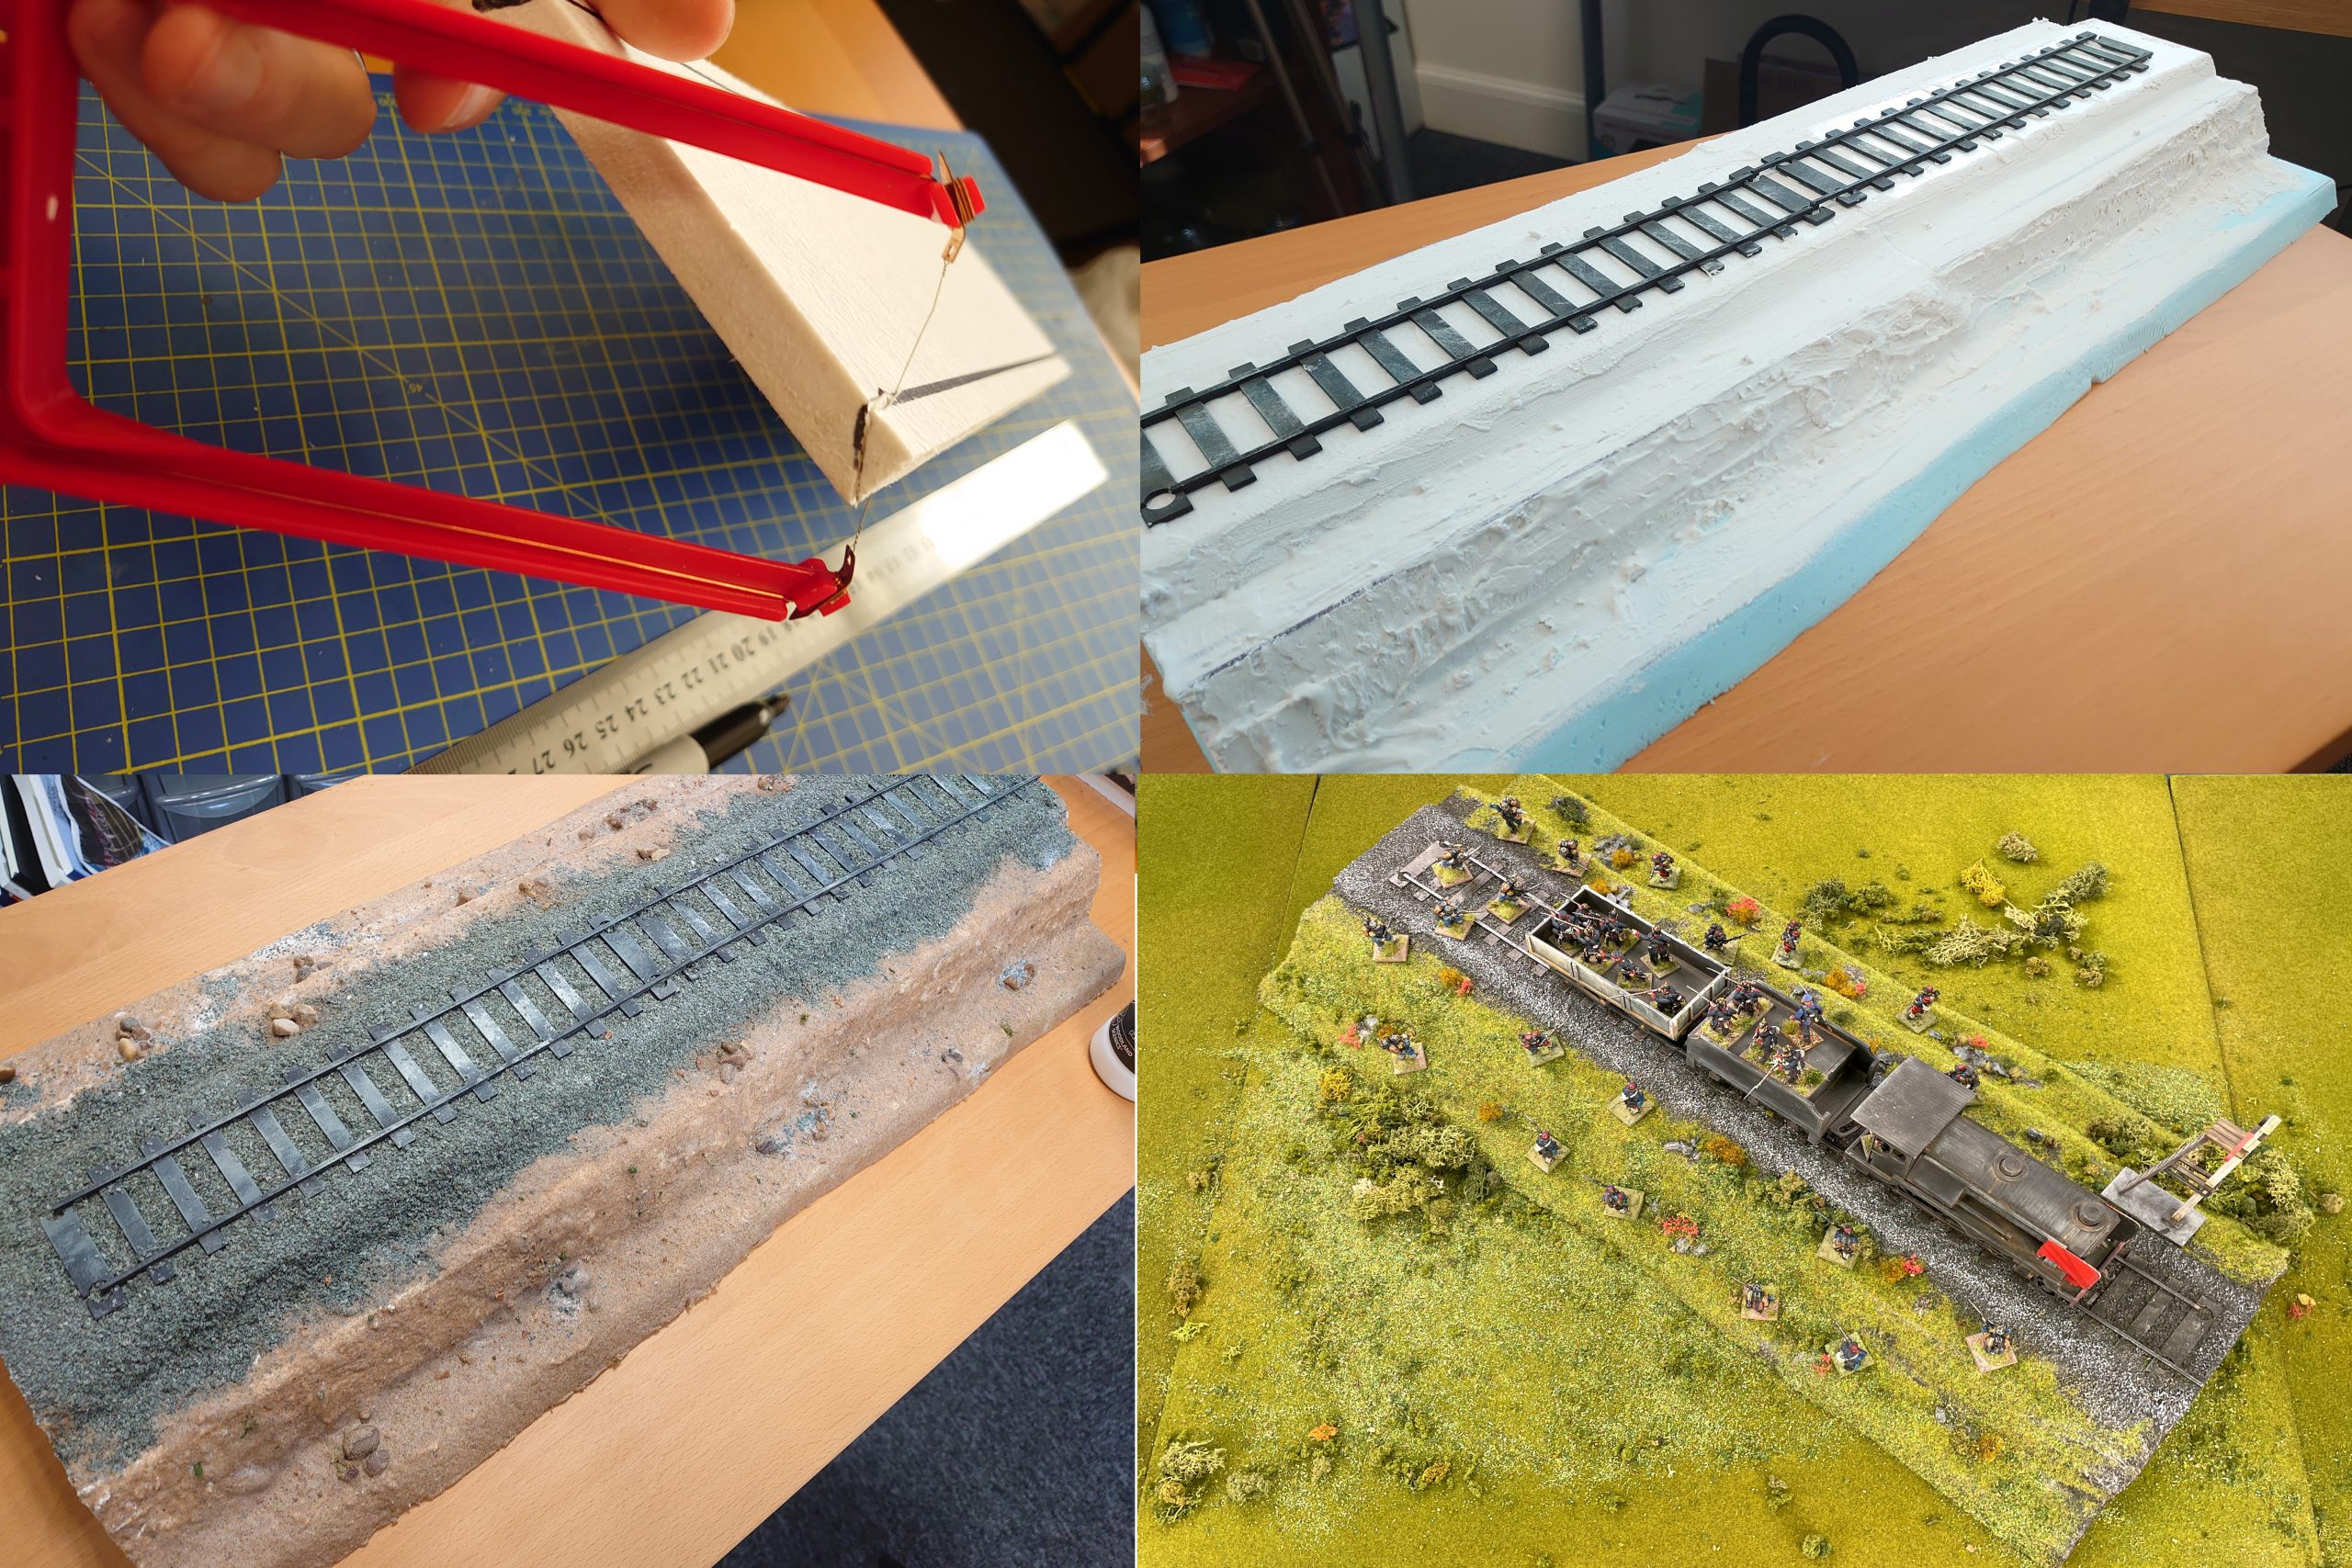
Marc knocks together a Franco-Prussian War railway embankment, with a fitted track.
We needed some raised embankments to decorate the gaming board for Bill Gray’s Blut und Eisen article in Wi406. I got the track and train elements as MDF kits from Sarissa, which made life easier, but I needed to build up a high European style embankment for them to sit on as these imposing banks and the way they impacted the battlefield is the focus of the article.
Before getting stuck in and hacking away at the styrene (aka polystyrene), I needed to determine how high and wide I wanted the banking to be. The embankment needed to look suitably imposing on the tabletop so I wanted it to be at least as high as the train.
I used the track as my guide for the width and decided to prep this section fully so it could guide me into how to build the rest of the embankment.
I used a sharp knife and hot wire cutter to shape the styrene. A knife works well for basic cutting, especially 90-degree angles. The hot wire cutter is really handy for anything sloped and also doesn’t blunt like your blades will.
A basic sloping gradient is applied to the top of the embankment …
… then the edges were sanded, to produce a smooth finish.
Once I had the uppermost section ready, this was fixed to a stack of styrene tiles at my desired height, fixed together with PVA glue.
I stepped the embankment, leaving a couple of 25mm flat sections so that miniatures could be safely positioned on the flat surface. This kind of undulation is actually quite accurate so that’s an added bonus!
The above process was then repeated to produce the slopes of the embankment. Here you can see the markings indicating where the gradient was to be cut before I went in with the hot wire cutter to slice through them all.
The upper section was then dressed in a layer of medium-sized modelling stones to represent ballast. I also fixed a few pebbles in place by applying a layer of PVA to the base, onto which the stone was then liberally sprinkled. On top of this, I applied a 1:5 mix of PVA and water to seal things down.
Once dry, the sides of the embankment were then covered in fine sand.
The embankment was then painted and decorated with flock to match our wargaming table. I added a few flower tufts, for some extra pop and sparkle.


